
DIY Plotter in Progress
Be warned: this is a long post.
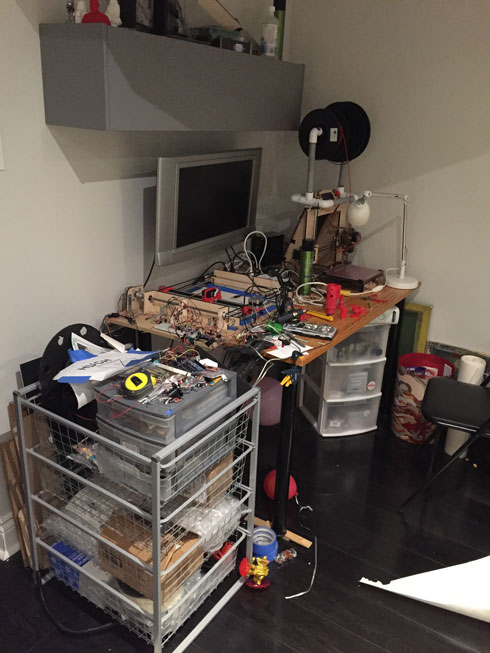
Just over a year ago (end of 2014, beginning of 2015), I completed my repairs and rebuild of my basement. I took a small corner for myself as a work/research/lab space. Otherwise known as “where I keep my junk”. The following is how my corner looked after I’d set up my 3D printer and mounted a little cabinet and a TV/monitor.
In order to understand how weirdly frugal I am, I present my AliExpress orders for the last year. When you work from home and are self-employed, you attempt to locate the best deals. Even if that means waiting 4 weeks for your stuff to arrive. And you buy in bulk. I’ll point out that this is only my orders, compiled, from the past year. This does not include orders from SparkFun, Adafruit, drop-ins at Creatron or Sayal or A1. I swear I’m not a pack rat.

That is there to illustrate that I was outfitting my space with “stuff” to work on. Whether or not I had a plan didn’t matter so much as having hardware on hand for any of my flashes of inspiration. One of the items I bought was 3 metres of timing belt. The initial plan was to build a second 3D printer, I think. I really don’t recall. But that makes the most sense, I bought timing belt, pulleys, smooth rods and linear bearings. I’d argue there are a lot of options for projects but they’d all revolve around moving something back and forth.
I digress.
I decided one of my first projects was to play with acrylic resin and cast some stuff. I was already mold-making and casting something for my father-in-law (I had the stuff on hand), I thought I’d run timing belt in a yogourt lid and try making a “big ol’ gear”.
And it worked! I realized I had zero need for a “big ol’ gear” so I chalked that up to proof of concept. If you need a gear to match with a timing belt and pulley, there’s your solution. You’re welcome.
This was when I decided to take stock of the stuff I had laying around and what I could do with it. I abandoned the 2nd 3D printer build because I wasn’t too impressed my first printer (all due to me being impatient. it’s a good printer) and didn’t feel like consuming my time in building something else I wouldn’t like. I had this big sheet of extra sturdy and thin foam core. I felt it might work as structure for a machine. So I arbitrarily cut it up to make carriages for a … thing …
So I can successfully move something back and forth with my hand. I was really impressed at my ingenuity. Then I decided to get all wacky and build a Z-axis carriage.
There are glimpses of my really cool Millennium Falcon rug in that picture. You need to get one. They’re cool. Really cool.
This, by the way, is not a good design for a foam core machine. It’s too heavy. But it worked. The following is a wee timelapse video of me soldering motor EasyDriver boards. LOOK AT THAT LINK! 4.50 FOR 5 BOARDS! ALIEXPRESS! ALIEXPRESS!
![]()
The reason I needed EasyDriver boards was simple; I needed a way to control the motors moving my machine. You didn’t think I was going to push it around with my hand forever, did you? NO! I discovered GRBL and planned out the machine based on how GRBL works. GRBL, now that I’ve written it three times, is an arduino-based CNC system. It parses gCode and can move a tool around. If you don’t know what gCode is or CNC or … tools … I don’t know, get googlin’.
The net result of using GRBL and gettin’ proper is a lot more wires.
The following video is me controlling my machine via GRBL Controller on my laptop. It’s a really big deal if you’ve been wiring things and honestly out of your depth as I so obviously was.
Note I beefed up my build with low tack painter’s tape. For real.
I ended up bored messing with it as it was. Once I got it working, I didn’t have any reason to continue. So I did something else. I made some art.
I made some infinity mirrors and taught other people how to make them, too.
I visited New York and checked out Sub Rosa where Josh makes magic.
I bought 1,000 batteries,
1,000 vending machine balls
and 1,000 LEDs and made throwies.
I participated in Maker Festival Toronto
I taught another workshop.
I designed and executed on a big LED arduino-driven clock.
I designed a t-shirt for my friend Stacey who coined the phrase “Charming Dirtbag” and made me giggle for about a month because of it.
I helped the brilliant Brent Marshall on a big LED-lit sign for the Grey Cup.
I designed and executed a light bar after someone sent me a link to The PixelStick. Remember I’m cheap/frugal mostly so if I see a $350 USD light toy, I’ll try and build my own. If you’re not into driving yourself insane building your own and have the dough, I highly recommend the real thing. It’s gorgeous.
But mine works fine.
Then I took apart some travel speakers and salvaged the actual speakers. Here’s the Imperial March through Arduino.
Then, last month, I got that itch to mess with my machine. It’d sat there, disused for nearly a year. I was either going to gut it and trash the foam core or rebuild it and trash the foam core. One way or the other, that foam core had to go. So I started re-designing based of materials on hand. I had plywood lying around from bad design decisions. That’s sturdier than foam core. And away I went cutting, drilling and designing on the fly. The center placement for the motor was ill-advised, by the way. I don’t know how to competently “splice” timing belt.
Then I went all cray-cray and started designing for 3D printed parts for the x-axis in TinkerCAD. The further down that rabbit hole I went, the tighter the design became.
You’ll notice I designed for a servo instead of a stepper motor because all I required was up and down for a pen or similar drawing tool. And there also happens to be a GRBL implementation to do just that.
Now my machine draws.
I’m taking another break for the moment and printing up a lightsaber for my son.
I have a feeling I’ll return to the plotter because I have something in mind for it to do beyond frustrate me.
My TinkerCAD public files including the handle to the light bar and the modelled files for the plotter.
A year later and this is my workspace. Like I tweeted to robotgrrl.
@RobotGrrl @STEAM_Labs a clean desk is the sign of a cluttered mind.
— Hugh Elliott (@hughqelliott) January 16, 2016
How incredible! Appreciating the persistence you put into your blog and detailed information you provide.