Disco Stairs
As part of my “git ‘er done” mindset of the past month, I decided to tackle a project that’s been on my mind for a while.
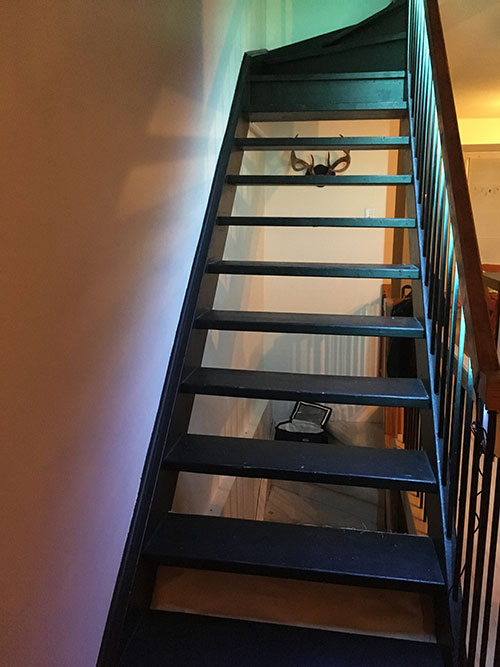
Our stairs have been painted black. The primary reasoning is they’re old stairs and not in great shape and black is a good cover. However, at night, they’re hard to see. Quelle surprise. (that’s french for “duh”)
A number of member of my family suffer from Retinitis Pigmentosa. It often causes something called Night Blindness. For the time being, I don’t have it. However, my mother does. She walks around in the evening with a bright LED flashlight and I know she struggles on our stairs. I gave thought to cutting a channel into each step and laying down a strip of phosphorescent resin or something white but I wasn’t confident in that approach and worried about messing with the integrity of my stairs.
So out comes an old LED strip I had in a bin. This is a standard RGB LED strip, non-addressable. Non-addressable means I can only light all the LEDs the same colour. I can’t light individual LEDs. So this strip has been sitting in a bin for a few years being useless.
Until now, that is.
My idea was to use a light sensor that could determine when it’s too dark for someone with moderate vision issues to see out stairs and to activate an LED strip, running under the railing pointed at the stairs, to light up. Thus illuminating the stairs.
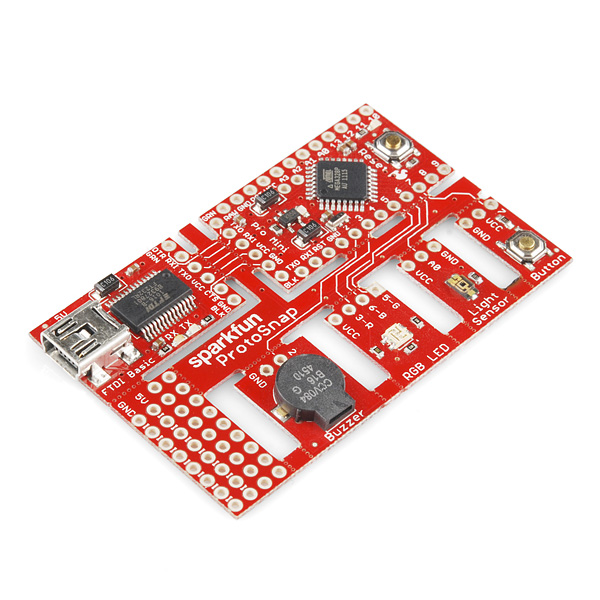
Light sensor (photocell). It’s important to note that most sensors are essentially providing a value of resistance from 0 to 1023. The photocell is no different. I happened to have a Sparkfun ProtoSnap (no longer available) from attending the first EyeO festival. At the time, I didn’t know what to do with it, but from time to time lately, I’ll snap off a part and use it.

Using a light sensor generally involves piping voltage through it and reading the analog value from the resistor. The brighter it is, the higher the value. If you’re looking for a simple tutorial, look no further.
Also the LED strip is a 12V SMD 5050. That link isn’t the actual strip but it’s similar. Here’s a handy wiring guide for connecting the strip to your Arduino through some MOSFETS. Again, take a gander at the tutorial for hooking the strip up and playing a bit with it.

So I took both those tutorials and combined them.
I taped the strip in place, positioned the controller and tested it out. Barring one small issue with the green pin not working initially, the lighting worked great! And my kids dubbed them “Disco Stairs”.
The last step was to make a project box to clean it all up. Couple of quick slices on some dense foam board and a project box I could zip tie to the railing was completed.
So now when my mother visits, I’ll be reassured that she can see the stairs when she needs to climb them at night.

